

Navigating the app
Learn the English sidebar and shell actions so every later how-to matches what you click.
Before you start
- You can log in past License
- Setup wizard finished or skipped
- You know your license tier (menus differ by tier and role)
Steps
1. Find the left sidebar
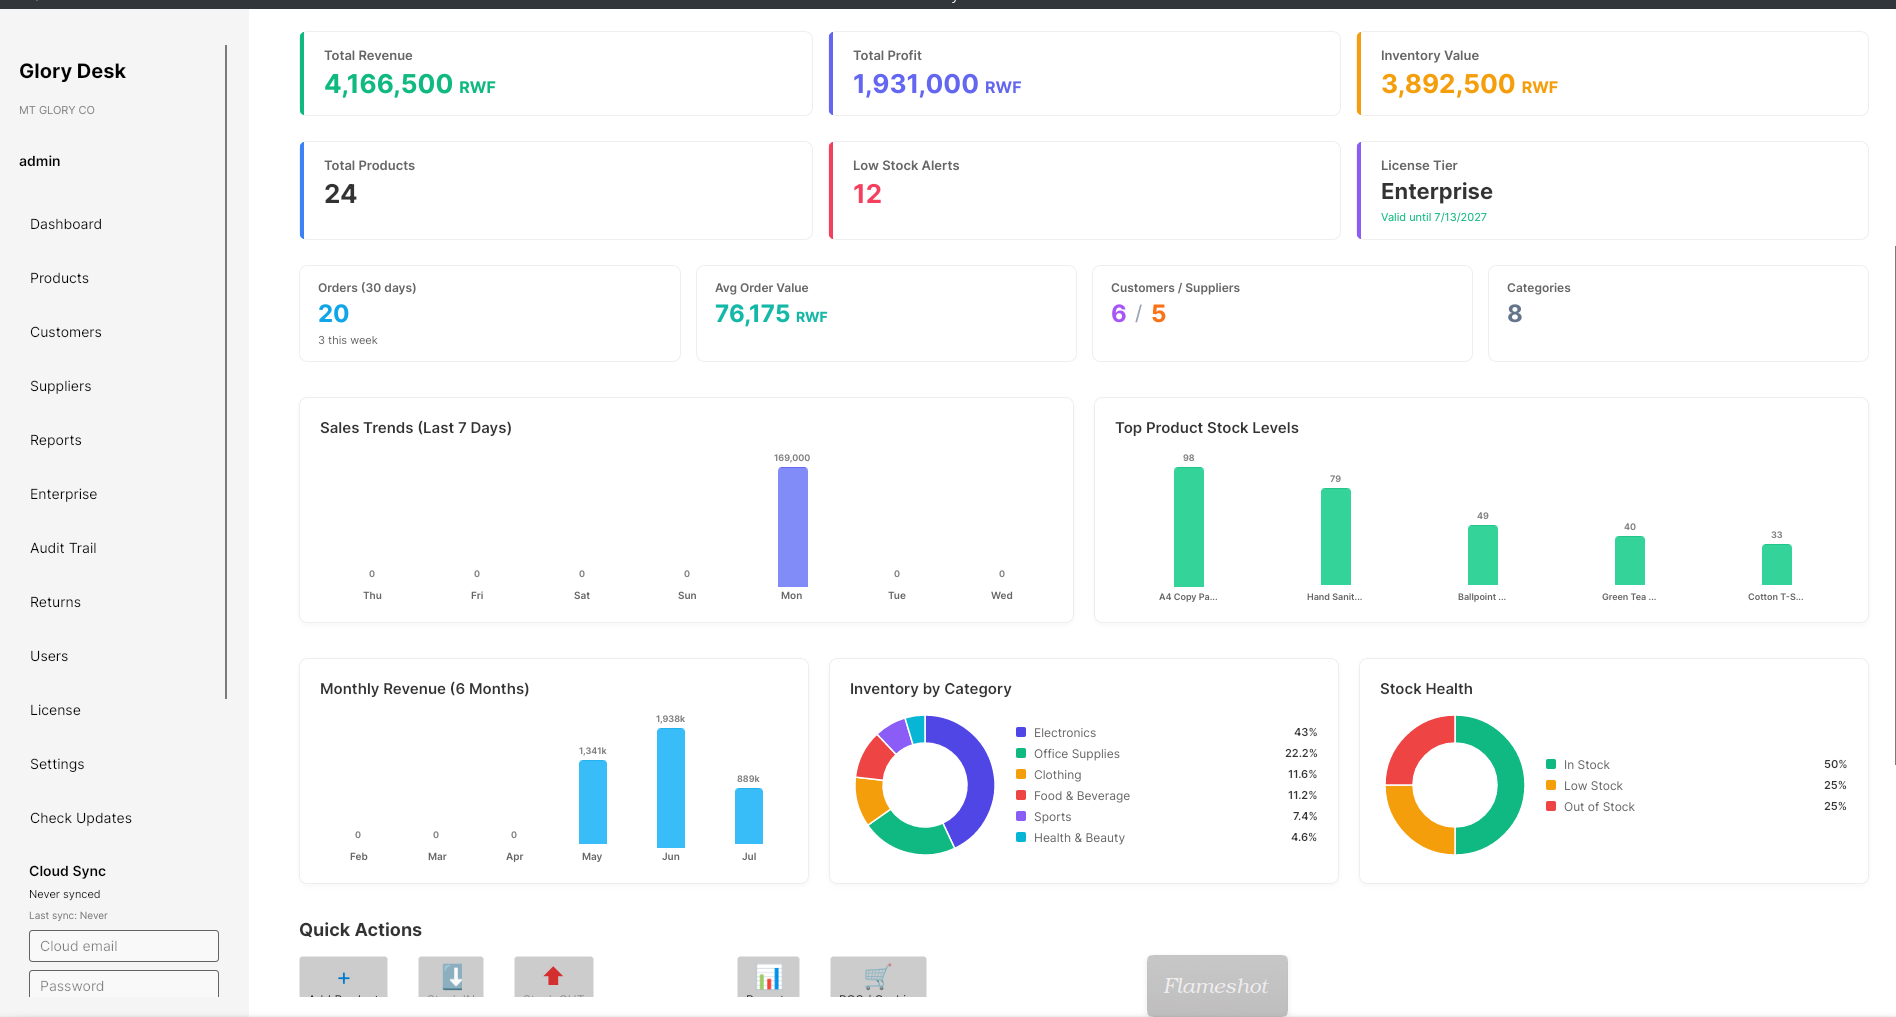
After login, the left sidebar is the main menu. Click a label to open that area.
Common English labels:
| Sidebar label | What it is for | Typical tier / note |
|---|---|---|
| Dashboard | Today’s overview, alerts, KPIs | All |
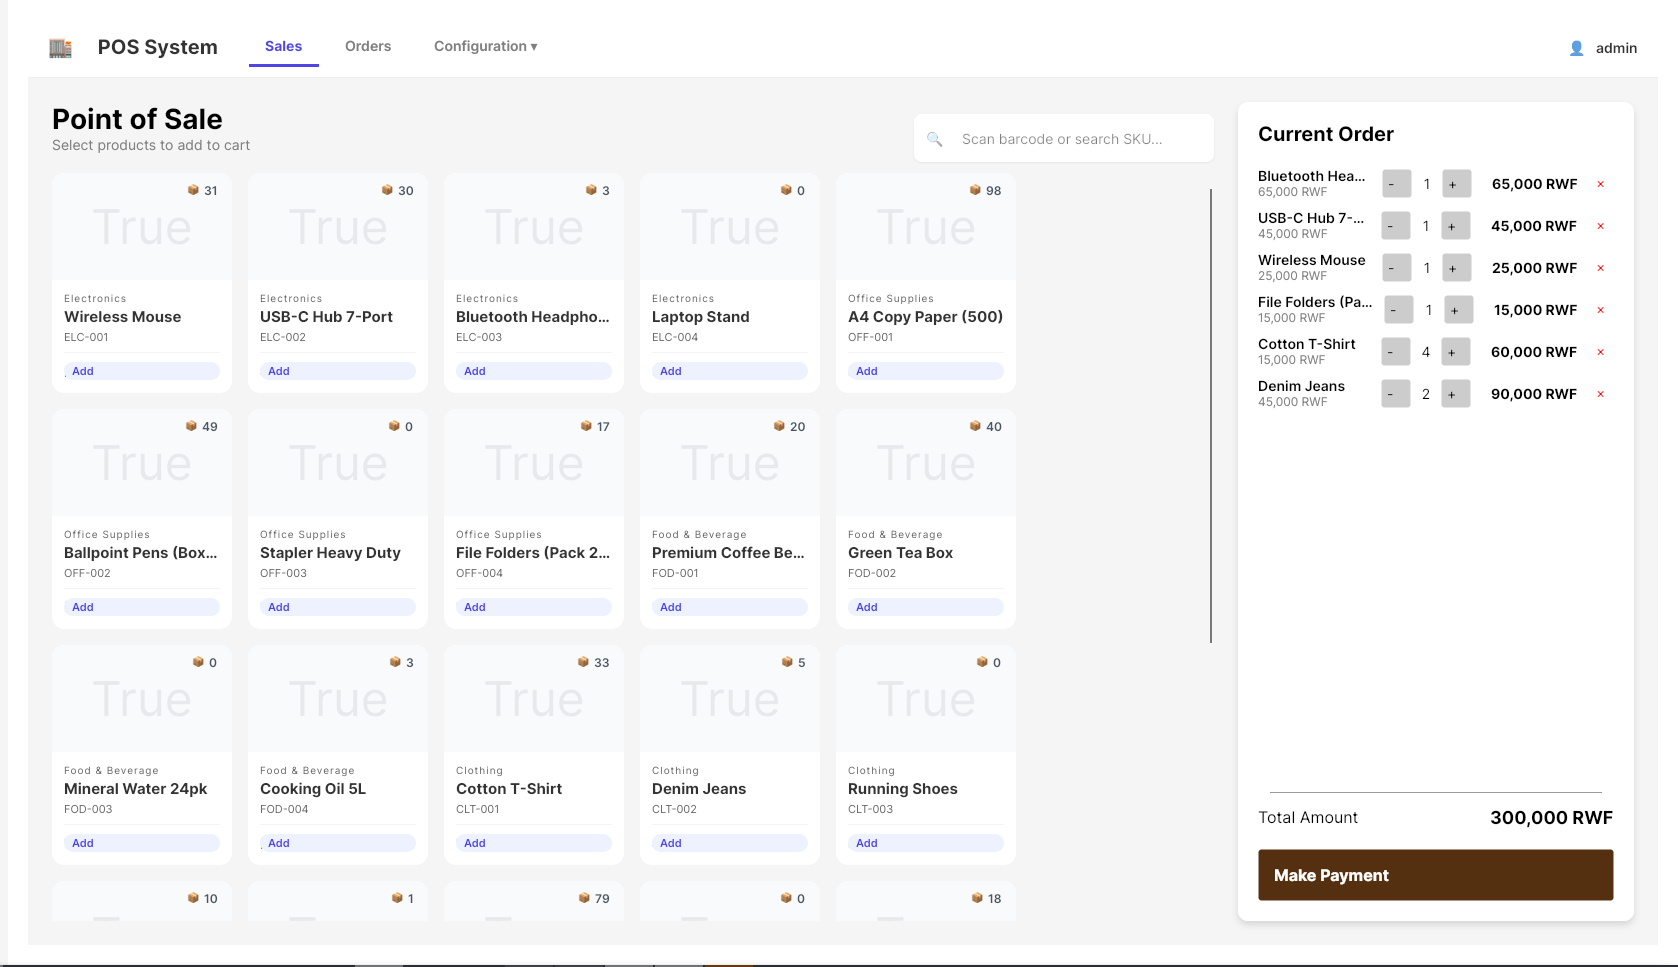
| Checkout / Cashier | Point of sale | Medium+ |
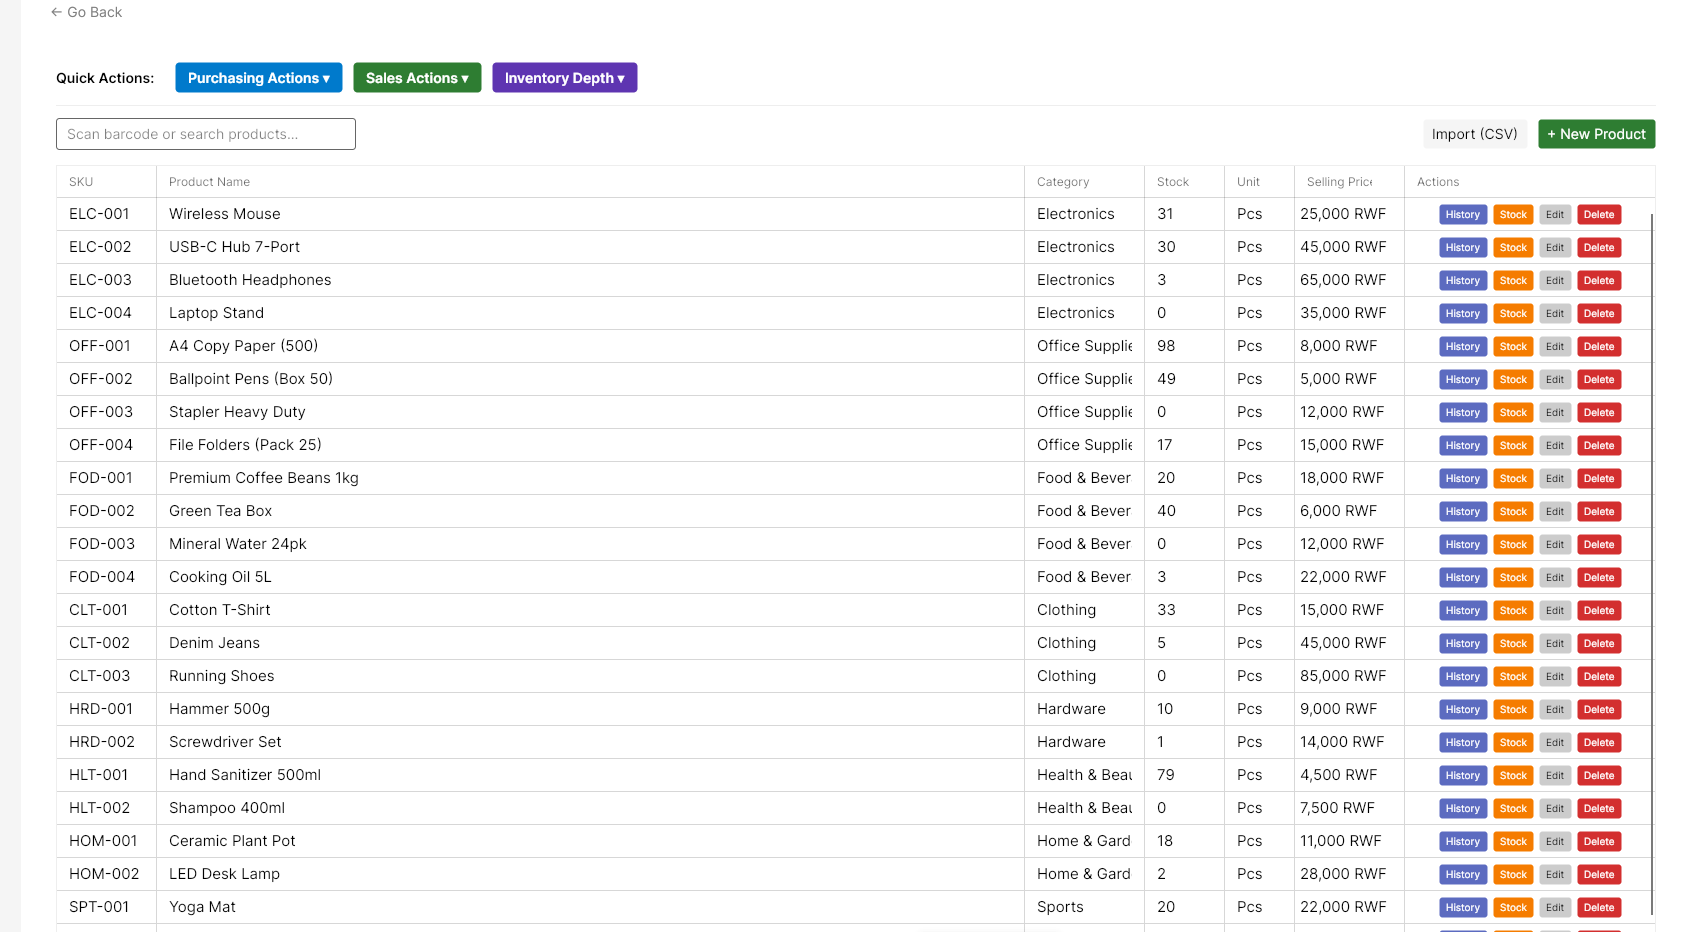
| Products & Stock | Products + Buying / Selling / Stock Tools | All (tools vary) |
| Making Products | Manufacturing / BoM | When module + tier allow |
| Customers | Customer list | All |
| Suppliers | Supplier list | Medium+ typical |
| Accounts Payable | Supplier bills, aging schedule, payments & credits | Medium+ |
| Employees | Staff directory and work records | Medium+ |
| Attendance & Leave | Daily attendance register and leave requests hub | Medium+ |
| Reports | Reports & Insights hub, PDF/Excel export | Higher tiers for full set |
| Enterprise | Enterprise Hub | Enterprise |
| Activity Log | Audit trail | Pro+ typical |
| Returns & Refunds | Returns and credits | Medium+ |
| Expenses | Operational expense logging and categories | Medium+ |
| Team Users | Users and roles | Admin / Manager |
| License | Tier, status, Hardware ID, activate again | All |
| Settings | Taxes, accounting, modules, word labels | Admin / Manager |
| Check Updates | In-app version checker and one-click auto-update | All |
What you see also depends on user role and Settings → Modules.
2. Find anything with "Go to..."
If you don't know where a screen or a settings tab lives, don't hunt through menus.
- In the sidebar, under your username, use the 🔍 Go to... search box.
- Type a few letters of what you want (e.g. journal, tax, reorder).
- Matching pages appear below — each shows its title and its path (e.g. Settings → Accounting → Journals) so you know exactly where you're headed.
- Click a result to jump straight there.
This searches every top-level screen, every Settings sub-tab, and every report — useful for settings buried a few clicks deep, like Journals or Chart of Accounts.
3. Use Products & Stock quick menus
- Click Products & Stock.
- Use the quick action menus when shown:
Buying
- Ask Supplier for Price → Requests for Quotation
- Orders to Suppliers → Purchase Orders
- Suppliers
Selling
- Price Quotes / Customer Orders → Sales (quotes, orders, repeat bills)
- Customers
Stock Tools
- Stock Counts
- What to Reorder
- Demand Forecast
- Store Locations
- Damage / Loss Write-off
4. Open Checkout when you sell at the counter
- Click Checkout / Cashier.
- If the app sends you to License, your tier does not include POS — see License tiers.
5. Shell actions (theme, user, updates, exit)
Look for these controls on the app shell (top or menu area; exact placement can vary by theme):
| Action | Use it to… |
|---|---|
| Check Updates | Look for a newer Glory Desk build |
| Toggle Theme | Switch light / dark appearance |
| Switch User | Log in as another person (shift change) |
| Exit Application | Close Glory Desk |
Prefer Switch User over sharing one password across the counter.
6. Change language
- Sign in as Admin or Manager.
- Open Settings.
- Find language / display options.
- Choose English, French, or Kinyarwanda.
- Confirm the UI updates.
Word Labels in Settings can switch some wording between simple English and accounting terms. This manual always uses the English sidebar names above.
7. Check for updates and read changes
- Choose Check Updates in the sidebar.
- If an update is available (e.g. Update Found! Glory Desk 1.2.0), an update notification appears.
- Click View Changes to read the release notes on Releases or a specific version page like
/releases/1.2.0. - Click Install & Restart to automatically download and apply the new version.
Updates use the official Glory Desk feed (GitHub releases). The app automatically detects whether it was installed via Velopack or Inno Setup and applies the update cleanly.
8. Know the main roles (Team Users)
| Role | Typical access |
|---|---|
| Admin | Full access, settings, users |
| Manager | Broad operations |
| Accountant | Money / reports focused |
| Cashier | Checkout-focused |
| Staff | Limited day-to-day |
Exact permission labels include POS, Inventory / Products, Customers, Suppliers, Purchase Orders & RFQ, Sales Orders & Quotations, Returns & Refunds, Reports, Audit Trail, Manufacturing, Settings, User Management.
9. Cloud Sync panel (Enterprise)
On Enterprise, look for Cloud Sync controls (connect / register, sync now, backup, restore). Configure only after MT GLORY has enabled your cloud path.
What success looks like
- You can open Dashboard, Products & Stock, and License without errors
- Cashiers know where Checkout / Cashier is (if tier allows)
- You know how to Switch User and Check Updates
- Missing menus make sense (tier or role), not “broken app”
If something goes wrong
| Problem | What to try |
|---|---|
| Sidebar item missing | Check License tier + user role + Settings → Modules |
| Clicking a feature opens License | Upgrade tier or enable module; see License tiers |
| Language looks wrong | Settings → language; or Word Labels preset |
| Update fails | Confirm internet; retry later; download from Download |
| Wrong user still logged in | Switch User or Exit Application, then login again |
You finished Part 1 (Getting started)
You can install, activate, sign in, set up, and move around Glory Desk.
Next: continue with Day-to-day — Dashboard, then products, Checkout, customers, quotes, suppliers, purchase orders, and returns.